I wanted to share some more shortcuts that I have developed over time. With a rustic design, my fabrication does not require precision and pristine finishes. I would much rather spend time on the design and fabrication than the finishing. And since my pieces are one of a kinds, I am not duplicating any precise design.
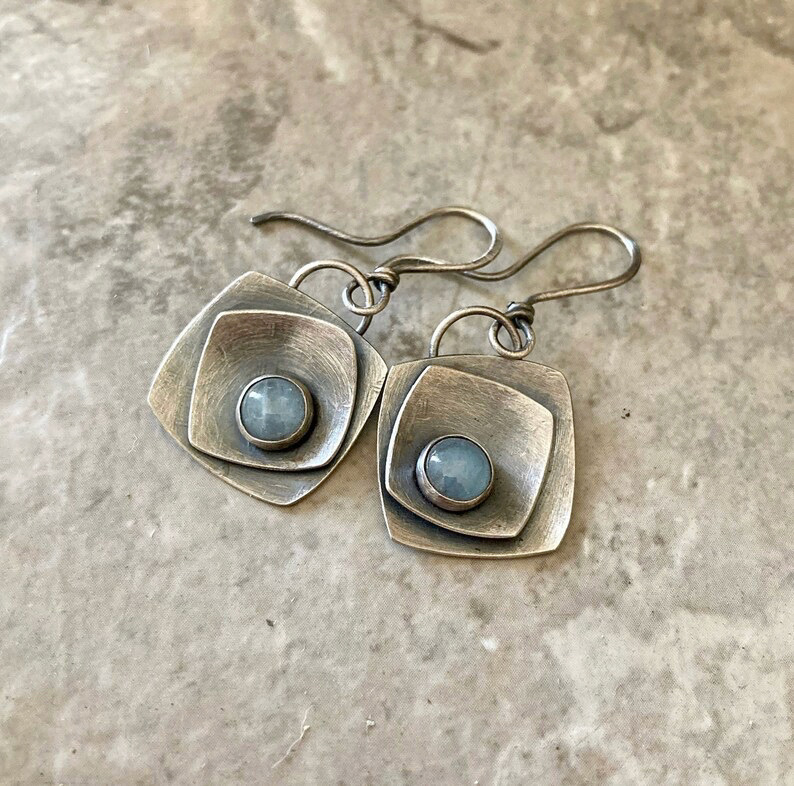
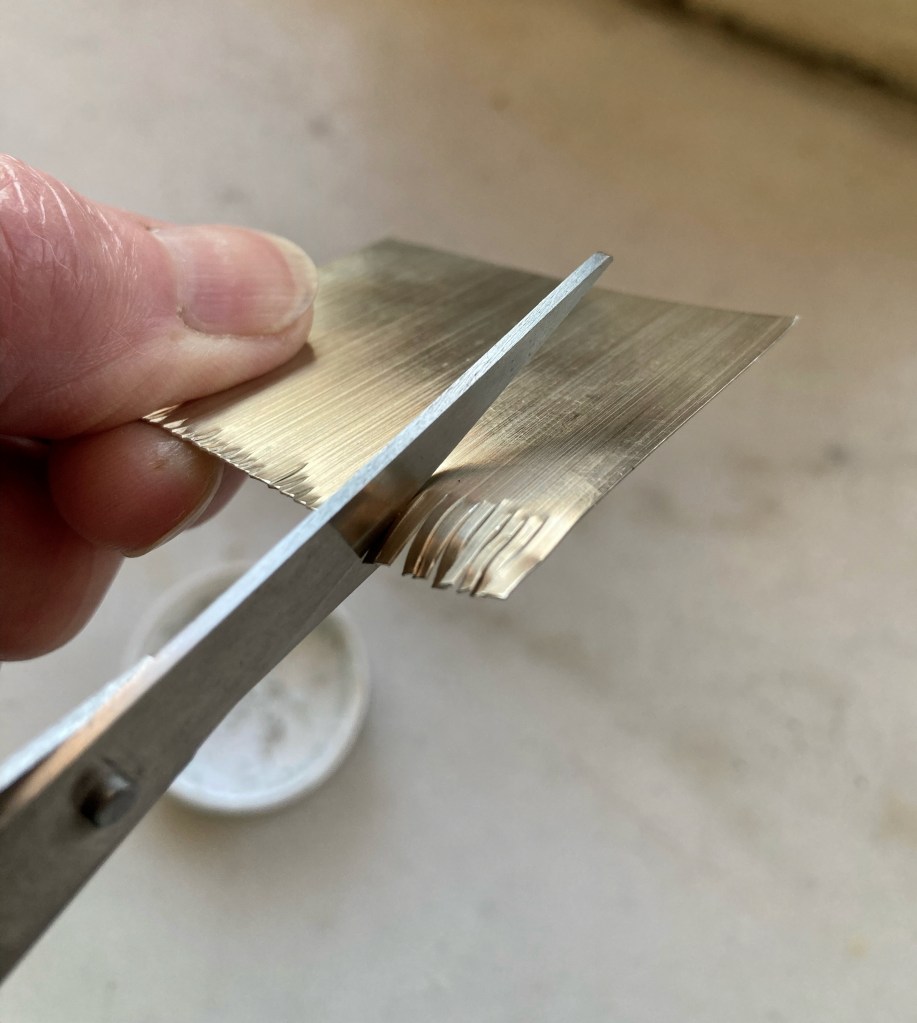
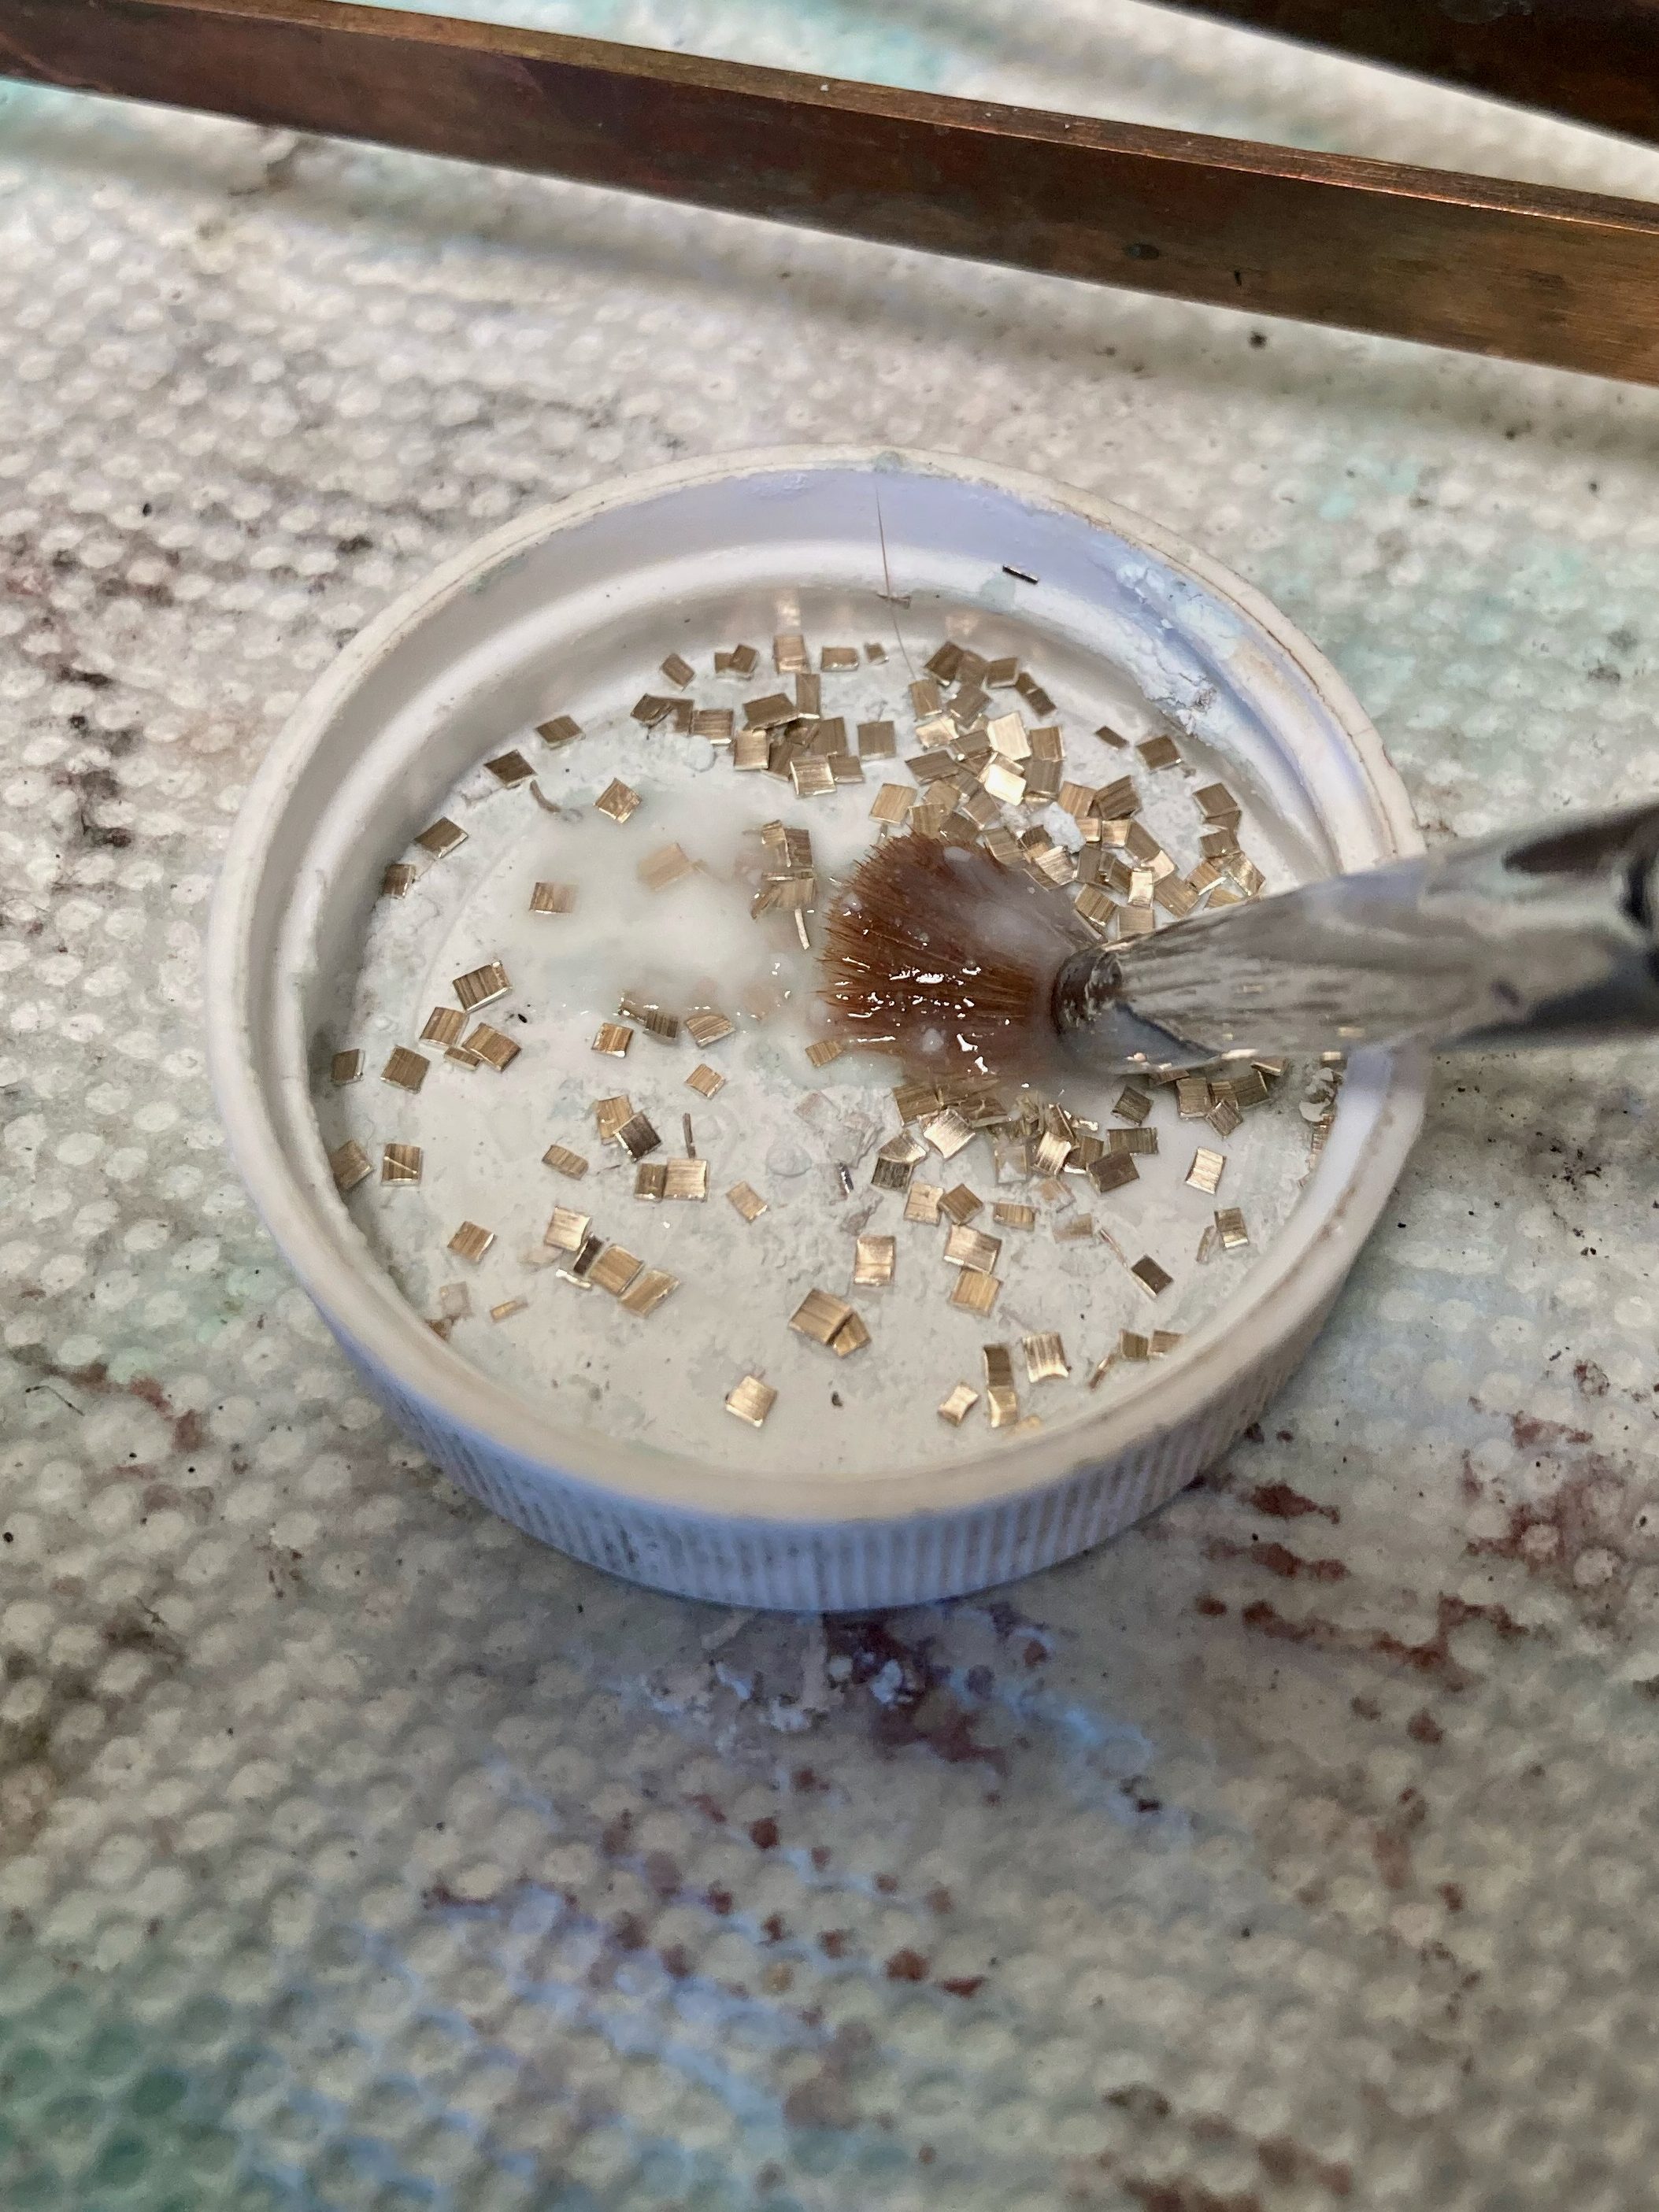
TIPS: The first photo shows aquamarine earrings with soldered layers. To create the pieces of solder, I use scissors to cut tiny pieces from a flat sheet. I cut strips about ¼ inch long on the sheet and then cut across the sheet to create the tiny pieces. I try to cut them into the little container by covering the cross cuts with my finger to keep them from flying around. Some are larger and some are smaller which is a good outcome. When soldering wire, I use smaller pieces. When soldering a bezel onto a flat base, I use larger pieces. I then paint them with flux to keep them from tarnishing. You need clean solder and surfaces to get the solder to flow. If the solder is dry, I spray the little cup with water and this allows easy pick up with the tweezers to place the solder. I have 3 cups to hold easy, medium and hard solders.
When fabricating a pieces, there may be several soldering steps. So I start with the hard solder which has the highest melting point. Next I would use medium and finally the easy. This allows the previous soldering steps not to melt while proceeding onto the next step. The last photo of the periwinkle earrings required 4 steps. First soldering the square bezel together. Second, soldering the bezel to the back. Third, soldering the decorative square frame. And fourth, soldering the ear wire ring on the top.


Other methods from metalsmith include buying cutters specifically for making the tiny snippets. Many cut only the solder chips they need for a project in order to keep them clean. Some methods include buying solder in wire form and touch the wire to the metal parts being soldered together. Good idea to match the best process to achieve the best result. Trial and error may highlight which process is right for you.
I love layers on earrings. Layers give the earrings nice depth and shadowing in the designs. And lots of practice soldering these layers together! The more times you do something, the better you get at it. Have fun on your projects!
